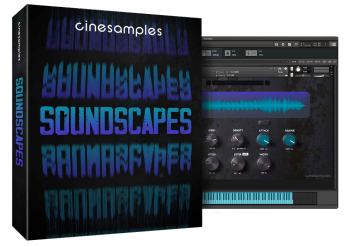
 KONTAKT – 1,32 GB
Soundscapes opens up an entirely new sonic palette of tonal and atonal sound design through granular synthesis. Full of interesting textures, it incorporates samples from violinist Michael Levine. A departure from our usual symphonic style, Soundscapes is a welcome contrast and unique partner to our CineSymphony lineup.
The possibilities are endless. We’ve created a set of patches in a few categories to give you a start. Try a totally different sample in one of our patches and make your own!
Patch Categories:
– Pulses (Tonal and Atonal)
– Textures (Tonal and Atonal)
– One Shots
– Pads
– Sound Design
*** Keep in mind, high values of some of the parameters below will heavily tax your CPU. Therefore, some patches may not work well in a fully loaded template. ***
THE ENGINE
From the ENGINE page, chose your sound sample from 25 categories in the pull down menus at the top. The sound sample is displayed in the waveform window at the top.
AUTO MAP forces the sample to conform to A440 on your keyboard. When off, the sample plays as is at Middle C.
POSITION sets the playhead at the desired starting point in the sound sample when you press a key.
SMOOTH adjusts the position of the playhead more smoothly.
The VOLUME controls the volume of the grain. Various settings can lead to a wide range of output levels.
The MOTION control moves the grains. It determines how much movement occurs (forward or backward) from the starting POSITION. Lower values focus on a smaller area of the sound sample delivering a more consistent texture. +100% is real time playback.
DENSITY determines how many grains of the sample are played per second. Higher values render a more smooth a full sound.
*Higher DENSITY values also increase CPU usage.
RAND DENSITY shuffles and randomizes the timing of each grain based on the DENSITY setting. Think of it as unquantizing the playback of the grains to a more humanized playback. Higher values prevent phasing and comb filtering.
Click TEMPO SYNC to rhythmically sync to your DAW. The DENSITY now adjusts the number of grains per bar. For the tempo sync patches to work in Kontakt standalone, the transport needs to be running for the live quantize to work.
The ATTACK and DECAY knobs adjust the attack and decay volume envelope of each grain. Higher values sound more smooth. You can automatically set these values by pressing AUTO above the ATTACK knob. The Engine will set these values based on the DENSITY value to provide a 100% overlap of the grains for a smooth sound. While TEMPO SYNC is on, AUTO will recalculate the number of miliseconds for the ATTACK and DECAY to provide a 100% overlap. While AUTO is selected, you can increase or decrease the overlap based on percentage.
*Higher DENSITY and ATTACK and DECAY values will increase CPU usage. If you want more thickness, keep them moderate and slightly increase PITCH and WIDTH.
PITCH varies the pitch of each grain either randomly (RAND), or will set the pitch of each grain from random points from around the playhead (DRIFT) and vary it a few cents from the previous grain. Higher values give a greater chorusing effect. You can multiply this from 100 cents to one octave by using x12.
JITTER determines how far the grain is generated from the playhead either randomly (RAND), or wandering around within the range (DRIFT). You can increase this by x100 for larger samples. Like MOTION, lower values focus on a smaller area of the sound sample delivering a more consistent texture. RAND – Higher values pull from more of the sound sample giving a wider variety of texture. DRIFT – higher values give each individual key a different texture.
WIDTH randomly pans each grain to increase stereo width. HQ mode uses Kontakt’s surround panner (uses slightly more CPU).
FADE IN and FADE OUT give the grains a crescendo and decrescendo effect by individually altering the volume and filtering of each grain. This can be used to give each keypress a longer attack or release.
*** PRO USER HACK: Drag your own WAV files into the main window and have fun!
Make sure the WAV file is the same sample rate as your session. ***
FX PAGE
The FX Page allows you to add 8 consecutive effects in series, from left to right. You may bypass any one of them without actually removing it and losing your settings by pressing the red B. To toggle bypass of the whole FX chain, option click (alt on PC) the bypass button. You may also COPY and PASTE from one slot to another. REMOVE ALL FX does just that. It clears all FX slots. To clear only one slot, click on the effects pull down menu and select – EMPTY –.
Password/解压密码0daydown
Download rapidgator
https://rg.to/file/b427854cc9f4eedcd6060d3ca7e4c208/CS_Soundscapes.part1.rar.html
https://rg.to/file/b67a1a59905627b1265ec53fdfa2660d/CS_Soundscapes.part2.rar.html
Download nitroflare
https://nitroflare.com/view/8D56E604BB56E38/CS_Soundscapes.part1.rar
https://nitroflare.com/view/8736A3D24D36B6B/CS_Soundscapes.part2.rar