Published 11/2022
MP4 | Video: h264, 1280×720 | Audio: AAC, 44.1 KHz
Language: English | Size: 1.95 GB | Duration: 3h 46m
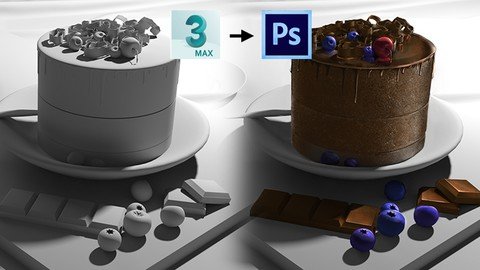
Learn how to use 3d as a starting template for your illustrations.
What you’ll learn
• Workflow going from 3d to 2d
• Adding Cameras and Lights in 3ds Max
• How to control perspective
• Arnold Render setup in 3ds Max
• Personalize Photoshop user interface set up
• Painting in Photoshop
• Utilizing Layer Blending modes in Photoshop
Requirements
• Need a drawing tablet
• Have 3ds Max (2015 or up) installed.
• Have Photoshop (CS6 or up) installed.
Description
Struggling with getting your ideas started?This 3D to 2D course may be for you then. Together we’ll go over how to get your drawings and illustrations to the places you want using a combination of CGI and digital painting. The most common pipeline for most designs whether they are a character or object is going from a 2d sketch to a more developed 3d model. However there are many benefits in starting from many would consider the more final stages in the pipeline. In this class I hope to share with you an alternative perspective on how to get your ideas started by using 3ds Max as a lighting and compositional tool for your illustration or painting in Photoshop to follow. While we will focus on 3ds Max and Photoshop specifically this workflow applies to any 3d or drawing software you have proficiency over. I hope that after going through this course you take away with you an alternative perspective on how you approach your own art and design. Course Overview:Learn how to set up lighting and cameras in 3ds Max.How render and save out images from 3ds Max.Workflow going from 3d to 2dAdding Cameras, Depth of Field and Using Safe Frames in 3ds MaxArnold Lights and Camera Exposure in 3ds MaxArnold Render setup in 3ds MaxAdjusting image value in PhotoshopPainting and utilizing Layer Blending modes in Photoshop5 hours+ video lecturesAdditional Content:I’ll provide all the brushes I use in Photoshop for youPreset/project files to follow alongWho am I?Hi, my name is Connor Chu. I’ve been an Autodesk Certified Instructor at Electric Waves Assoc., a small team of other certified instructors, for about 6 years now. Together we’ve helped our students build portfolios that have gotten them accepted into universities such as Pasadena Art Center, FIDM and USC. I focus primarily on teaching digital 2d and 3d design such as Photoshop and zBrush/3ds Max. My goal here is to bring you all the knowledge you’ll need to be able to be a successful artist and designer.
Overview
Section 1: Photoshop UI Setup
Lecture 1 Hotkeys & Brush Settings
Lecture 2 Customizing Photoshop UI
Section 2: Painting an Apple – Going from 3D to 2D part 1
Lecture 3 Creating lights, cameras and rendering images in 3ds Max
Lecture 4 Adding in color & additional shading in Photoshop
Lecture 5 Rendering texture and Layer Blending modes
Section 3: Chocolate Cake – Going from 3D to 2D part 2
Lecture 6 Creating cameras and adjusting FOV
Lecture 7 Setting up lights
Lecture 8 Rendering out our grayscale image
Lecture 9 Adding in flat color in Photoshop
Lecture 10 Painting over the cake
Lecture 11 Making the chocolate glaze shiny
Lecture 12 Filling in the toppings
Lecture 13 Enhancing our colors with Color Dodge
Section 4: Character portrait – Going from 3D to 2D part 3
Lecture 14 How to create more engaging camera angles
Lecture 15 Dynamic lighting setup
Lecture 16 Rendering out our grayscale image
Lecture 17 Adding in flat color in Photoshop
Lecture 18 Shading over the gun
Lecture 19 Adding more creases on the coat
Lecture 20 Adding more creases over the hat
Lecture 21 Painting the portrait
Lecture 22 Using Liquify to make minor adjustments
Lecture 23 Enhancing colors/values with Color Dodge
Any 2D/3D artists looking to expand their tools and workflow method
Password/解压密码www.tbtos.com