Published 4/2023
MP4 | Video: h264, 1280×720 | Audio: AAC, 44.1 KHz
Language: English | Size: 12.70 GB | Duration: 10h 48m
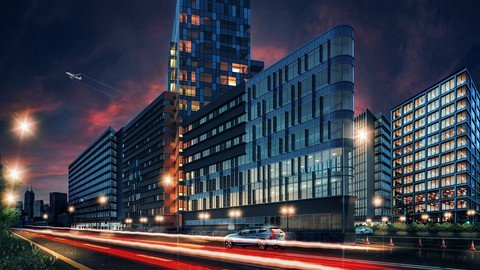
Post production (Post Processing) for architectural 3D Rendering in Adobe Photoshop from beginners to Advanced.
What you’ll learn
Post production in Adobe photoshop
Adobe Photoshop non-destructive editing workflow
Adding and removing subjects, color & light matching
Do multiple project with different difficulty level
Making environment, lighting, color adjusting
Combining render elements
Working with different color modes and depth
Fix render issues and camera
Make a variety of the same render shot
and many more tips and tricks …
Requirements
Basic computer knowledge
Description
In this course, you will learn from very beginner to advanced how to post-production your 3D render shots in Adobe Photoshop.Basically, you will learn 3 modes:You have your final render and just need some adjustments such as color, lighting, camera, and minor fixing like the color burn.You rendered your main subject and elements, but need to add extra elements, adjusting and matching the final result.You just rendered basic geometry raw and want to make the total scene elements and environment such as sky, plants, people, atmosphere, other buildings, vehicles, etc.In this course, you will learn all, step by step with full descriptions, mention shortcuts, why and how to use tools like professional, and many tips and tricks.Not only by passing this course you will improve your skills but also your working speed and workflow will be upgraded and you will get enough confidence to do all professional tasks in less time with better results.In this course, I teach you all actions with non-destructive workflow editing which make you able re-adjust and make different versions of the same project easily.This course also contains many useful and unique resources for your projects such as brushes clouds and lights.By passing this course you will be a true professional Adobe Photoshop photo editing master for architectural post-production.
Overview
Section 1: Chapter 1
Lecture 1 Promotion Video
Lecture 2 Analyzing_Project
Lecture 3 Open Image and Save PSD
Lecture 4 Fixing Camera Angle with Camera Raw Filter
Lecture 5 Fix Camera Angle by Free Transform Tool
Lecture 6 Fix Burned Surfaces with Camera Raw Filter
Lecture 7 Fix Burned Surfaces Manually
Lecture 8 Sky Replacement Automatically
Lecture 9 Sky Replacement Manually
Lecture 10 Add Sky Reflection on Waterpool
Lecture 11 Overall Color Adjustments
Lecture 12 Detail Enhancement and adding Vignette effects
Lecture 13 Preparing file for Print & Web
Section 2: Chapter 2
Lecture 14 Introduction: Preparing Project File
Lecture 15 Adding Alpha for Sky Replacement & Overall Light Adjusting
Lecture 16 Add Sky Reflection In Windows
Lecture 17 Add Birds & Branches
Lecture 18 Add Raindrops Method 1
Lecture 19 Add Raindrops Method 2
Lecture 20 Floor Reflection
Lecture 21 Adding Mist
Lecture 22 Adding Tree & Background
Lecture 23 Adding Grass
Lecture 24 Adding Peoples
Lecture 25 Overall Adjustments
Lecture 26 Final Adjustments
Section 3: Chapter 3
Lecture 27 Introduction, Adjusting
Lecture 28 Adjust Grass & Color Lights
Lecture 29 Adjusting Sky & Vegetations
Lecture 30 Add God rays
Lecture 31 Adding Background & Treelines
Lecture 32 Add Birds
Lecture 33 Final Adjustments & Publishing
Section 4: Chapter 4
Lecture 34 Introduction: Vanishing Point
Lecture 35 Sky Replacement
Lecture 36 Add Buildings
Lecture 37 Add Street Asphalt
Lecture 38 Add Roadblocks
Lecture 39 Add Grass
Lecture 40 Add Vegetation
Lecture 41 Finishing Road Asphalt
Lecture 42 Add Bushes
Lecture 43 Street Lights Part 1
Lecture 44 Street Lights Part 2
Lecture 45 Add Cars
Lecture 46 Fix Windows Transparency
Lecture 47 Buildings Re-adjustments
Lecture 48 Add Traffic Cone
Lecture 49 Interior Ceiling Lights
Lecture 50 Add Interior Details
Lecture 51 Cleanup Buildings
Lecture 52 Add Airplane
Lecture 53 Buildings Reflection
Lecture 54 Add Cars & Traffic Cones Reflection
Lecture 55 Add Street Lights & Bushes Reflection
Lecture 56 Migrate to new Document for better performance
Lecture 57 Add Lens Flare for Lights
Lecture 58 Add Car Lights
Lecture 59 Add Light Trails
Lecture 60 Project Final Adjustments
Section 5: Chapter 5
Lecture 61 Perspective Warp
Lecture 62 Vanishing Point in Advanced
Lecture 63 Smart Objects Tips
Lecture 64 Content Aware Fill
Lecture 65 Hue Saturation Tips
Lecture 66 Puppet Warp
Lecture 67 Quick Switch Mode
Lecture 68 Perspective Shading Intro
Who need to improve render shot quality,Who have no time to add elements in 3D scene to render,Who don’t have high performance computer to make huge scene and elements,Who need to learn photoshop for post processing,Who wants to speedup workflow and be a professional
Password/解压密码www.tbtos.com
转载请注明:0daytown » Architecture Post Production In Photoshop Zero To Advanced