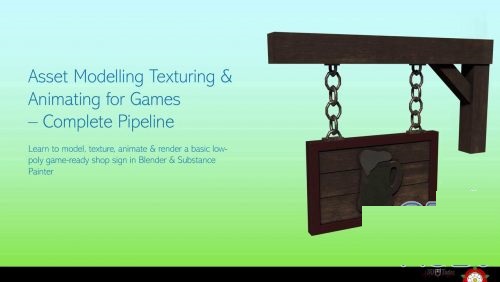
In this course we’re going to explore low-poly 3D modelling techniques to make a game-ready store sign in Blender. This course is designed for beginners to intermediate modellers. You need at least a basic understanding about Blender’s UI. The class will be using voice and key casting to give instructions so it’s very easy to follow. This course is great for, and aimed at absolute beginners. If you consider yourself an advanced 3D modeller, you may still find this course useful, since it might help you improve your workflow or provide you with much needed step-by-step guidance.
We will start by creating the frame for the shop sign in Blender. We will then begin to learn how to scale assets to real-world-sizes. Then, we’re going to create an ale mug logo for our shop sign. We’re going to cover how to import and use background images in a simple and easy to understand way – allowing you to create any logo of your choosing in the future with ease. Then, we’re going to learn how to create chain links using Blender addons. After that, we move on to learning how to save presets for future models, and how to use Blender modifiers to speed up workflow in Blender. We’re going to work on basic UV unwrapping, and I will show you how to mark seams and how to easily layout uvs for easy baking. Learning how to scale UVs to optimise resolution will also be taught in this class. We will cover how to put PBR textures onto the store sign mesh using Substance Painter. I will show you the tips and tricks to start working in Substance Painter, so prior knowledge of this software is not required. We will also cover how to import new materials into Substance Painter. After that, we will focus on applying these materials to our sign model in Blender. I will be showing you how to use the node wrangler to optimise the material transfer from Substance Painter to Blender. Then, we’re going to create a simple rig for our shop sign in Blender.
You do not need prior knowledge of animation for this course because I will be showing you the basics step-by-step. In the next lesson, we will animate the shop sign using the rig we created and will use key frames to make the shop sign look as if it is swinging in the wind. Then, we will turn our animation into a short film, and I will show you how to render animations.
We’re going to cover several methods, tips and tricks that will be very useful in the actual production workflow. Join now and take your 3D modeling skills to the next level!
Password/解压密码-0daydown
Download rapidgator
https://rg.to/file/ef41812961ce2fe732c633c00ad8e2c5/Blender_for_beginners_creating_a_low_poly_3D_model_complete_introduction.part1.rar.html
https://rg.to/file/808ec846309303fb04912bbe34cf61e2/Blender_for_beginners_creating_a_low_poly_3D_model_complete_introduction.part2.rar.html
https://rg.to/file/747a5eb7e11a65817529a4ae05ce2973/Blender_for_beginners_creating_a_low_poly_3D_model_complete_introduction.part3.rar.html
Download nitroflare
http://nitroflare.com/view/34DAD6071B432EC/Blender_for_beginners_creating_a_low_poly_3D_model_complete_introduction.part1.rar
http://nitroflare.com/view/A30EE8398C5DCF5/Blender_for_beginners_creating_a_low_poly_3D_model_complete_introduction.part2.rar
http://nitroflare.com/view/0166DC9418200EE/Blender_for_beginners_creating_a_low_poly_3D_model_complete_introduction.part3.rar
Download 百度云
你是VIP 1个月(1 month)赞助会员,
转载请注明:0daytown » Blender for beginners creating a low poly 3D model complete introduction